
William George is a name widely known in the industry and art form. His works have literally helped define Hollywood. The recent video addition to the original that he released of the Sci-Fi Air Show, featuring the Jupiter 2 has received such high views, that the numbers would be considered in the ridiculous range! Most impressive?… INDEED! To follow up with that successful video, Bill emailed us photos showing the Jupiter 2 build itself! Absolutely top notch!!
To view more Bill George’s Sci Fi Air Show, click the VIEW MORE Button Link below…


What is more correct, a clock that runs 5 minutes slow or one that is completely stopped?
I thought of this clock question often as I mulled over the decisions that one has to make when building a model of the Jupiter 2. Wanting to be accurate to the full size interior sets and also to the differently proportioned miniature means that cheats and compromises will be necessary.Of course, the ultimate Jupiter 2 puzzle is squeezing the 2 (or 3!) decks established on the show into the ship. I have seen some very clever and well thought out ways that fitting the decks into the ship could be accomplished. Still there isn’t a way to do it without dramatically increasing the scale of the ship or changing its exterior proportions. Because Moebius Models did such an amazing job with their 1/35th Jupiter 2 model matching the miniature version, I decided to construct the “full size” version of the ship. This amazing set piece was only seen a few times in the series but when it showed up it was always impressive. The Jupiter 2 was designed when it only had a single deck and so that was how I planned on building the version for the Sci Fi Air Show. Luckily, blueprints for the full size version survive which made construction much easier. I made the decision to build the ship 4 feet in diameter so the ship’s scale would be close to one inch to the foot. This scale would prove helpful when purchasing off the shelf dollhouse miniature pieces for set dressing.
Looking at the construction blueprints for the full sized mock-up, I noticed that it was build structurally around a six segmented radius, not the 8 segments reflected in the interior. I guess that the six segments were a result of engineering the ship to be supported by the three landing gear. I wanted my ship to match the full size version and so built mine with the six spokes. Since the only interior areas that would be visible would be through the main airlock and the windows cheating the number or interior beams was easy. One of my other goals was to build a few features on the ship that had never been seen but had been implied that existed. The first was a spotlight. In the episode “The Ghost Planet”, after the Jupiter lands, Don uses a spotlight to sweep the area in front of the ship. It’s never shown where this spotlight beam is coming from but I figured the logical spot would be the round opening on the right side of the upper hull. In the third season episode “Condemned of Space”, Will, Smith (and the robot!) exit the ship that is docked with the Space Prison by climbing down the ship’s ladder through the lower deck. I wanted to show how this would look from the exterior with the ladder extended down far enough to make entering and exiting the craft this way possible. A similar extending ladder is indicated on the original blueprints, but it comes out of the center of the fusion core. The last thing I wanted to feature was the extended E.V.A. porch. This was shown in the first season episode “The Derelict” but it was never shown in any wide shots. The best views of it I could find were in stills.

The six radial spokes and the floor are glued together. The spokes are ½ inch birch plywood and the floor plane is Masonite. Note the removable rod that passes through the center of the ship to keep the pieces true.

The underside of the main structure.

One of the more challenging parts of the inner structure were the wood rings the plastic sheeting of the hull will be attached to. The rings were created using a router on a compass rig and a belt sander. At this stage, I installed the landing gear bays that had been pre-built around the gear.

Once the rings were attached, I used a hole saw to remove material from them. Despite trying everything I could to lighten the ship it ended up being VERY heavy.

Since the hull of the ship would eventually be sealed up, I had to focus first on detailing the interior. Here you see the process of gluing sheet styrene to the areas of the interior structure that will be visible through the windows and the door.

The first area of the hull to be skinned was the lower hull. Sheet styrene was attached with caulking and small brads. Note the strip of plastic attached to the central rod. This was used to draw radial lines and to trim the skin once it was in place.

The lower hull completely skinned. To make things easier, I had the original blueprints printed out to be 1 to 1 scale with my model.

At this stage I was able to prime the lower hull and do the beauty paint for the interior. Hanging the model made it much easier to paint and created a lot less overspray.

Painting the interior. Note the detail pieces on the bench.

A view from the back. The interior surfaces have been painted and part of the upper hull has been skinned.

Detailing the interior. Placing in the freezing tubes and running interior lighting.

To try and keep the model light, much of the interior in made of foamcore. The foamcore was mounted with orthographic prints of renders of my C.G. version of the Jupiter interior. Fiber optics were poked through the prints to create the flashing lights.

All work inside the ship needed to be complete before the final skinning could be done.

Some of the interior details ready to be installed. Note the foamcore/printout wall on the right.

The completed interior.

Finally, the last of the hull is sealed up.

The landing gear were constructed of plexiglass and metal. I drew up the profile shape in illustrator and had six of them laser cut.

The exterior is primed.

After a trip to Radio Shack, a fusion core!

A “bench test” of the finished fusion core.

After the base coat of “Metallic Nickel” paint, I distressed the surface and used graphite and masking tape to create “hull seams”.

Construction of the Pilot and Co-Pilot chairs.

The force field generator under construction. I decide to go with the second season version as it had more interesting detail.

I had the most fun building obscure props like this transmitting station (“The Phantom Family”).

The “potato chip maker” that is about an inch tall.

Another fun project was building this full size first season laser rifle.

The “N.G.S. Scanner” that was later made into a table (“Ghost In Space”) and then a seductive female robot (“Deadliest of the species”).

The fully extended E.V.A. porch.

Constructing the brain tendrils from Fantastic Voyage that were used for the interior of the set seen in “the Derelict”. Fishing line is tied between the wood dowels and laced with clear caulking over dry cleaning bags. Clear plastic sheet with the dark nucleus rings drawn in sharpie are applied over the top along with polyester batting. A pass with a blow torch and you got brain cells!

The completed Derelict “set” The floor is simple Vinyl sheet dressed with cut–out large packing bubbles and extra strength spray mount.

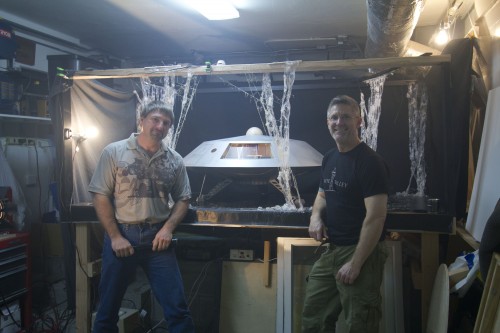
My brother was in town the weekend I shot the derelict interior and he helped with the shoot. It took me back to a time when we were kids and did pretty much the same thing only on a smaller scale and using a Super 8 camera.

Constructing the Manatou Junction set seen in “Visit to a Hostile Planet”. The 50 gallon barrels are dressed V8 juice cans.

A low angle shot of the Manatou Junction set. Although supposed to be a lumberyard parking lot, it sure does look a lot like it’s the outside of a soundstage. My set was a composite of many of the areas seen in the episode as the exact placement of them is unclear. I would guess that since the episode was filmed outside the crew was “following” the light causing the discontinuity in the backgrounds.

The Manatou Lumber mill set in my backyard with a scale indicator.

In my kitchen, I shot the Campsite Set, Happy Acres and the Crash Site.

After the Manatou set was shot, the set was broken down and parts of it were re-used. The platform the set rested on was 8 by 6 feet.

The platform after it was re-dressed as a section of runway for the air show exteriors.

One of the air show set-ups in place. I’m just waiting for the sun to be in the right place. Shooting in my small backyard was quite a challenge.

If there wasn’t any camera movement in a shot I would sometimes choose to shoot with a sky blue backing to get better reflections off of the ship. The windows in the main viewscreen were removeable as they could cause major reflection problems. In shots with lots of camera movement, like the boom down on the Manatou junction set, I would have to track the windows in maya and render the sky reflections.

A frame from a completed Derelict shot. It has the main model pass of the set, a separate pass of the spotlight (my brother holding a flashlight) shot in smoke, a painted background extension and two of my friends dressed up as John and Don.

A re-creation of the classic “landing in the ring” shot.

A finished shot of the Jupiter 2 at the air show. I go to air shows in California (This one is from the Salinas air show) and shoot my backgrounds. People give me strange looks as I shoot an empty part of the runway when there are dozens of super cool planes right behind me. When I shoot video. I set up the camera, turn it on and then walk away and pretend I am talking on the phone. This way people don’t pay attention to the camera and I get some great candid walk-bys.

A frame from the completed Manatou Junction shot. The background hills were stills I shot in Marin county. The window reflections and the robot were created in maya.
To view more Bill George’s Sci Fi Air Show, click the VIEW MORE Button Link below…