
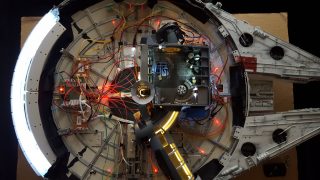
Chris Olson here again. Been a few weeks, and I thought I’d send you a link to some photos of another of my models. There are 37 photos in this gallery, picked out of my gallery of over 100 for this particular model. As before, feel free to use all (which I know is a lot still), or whichever selects you think best. There is 1 internal shot showing my lighting and boards.
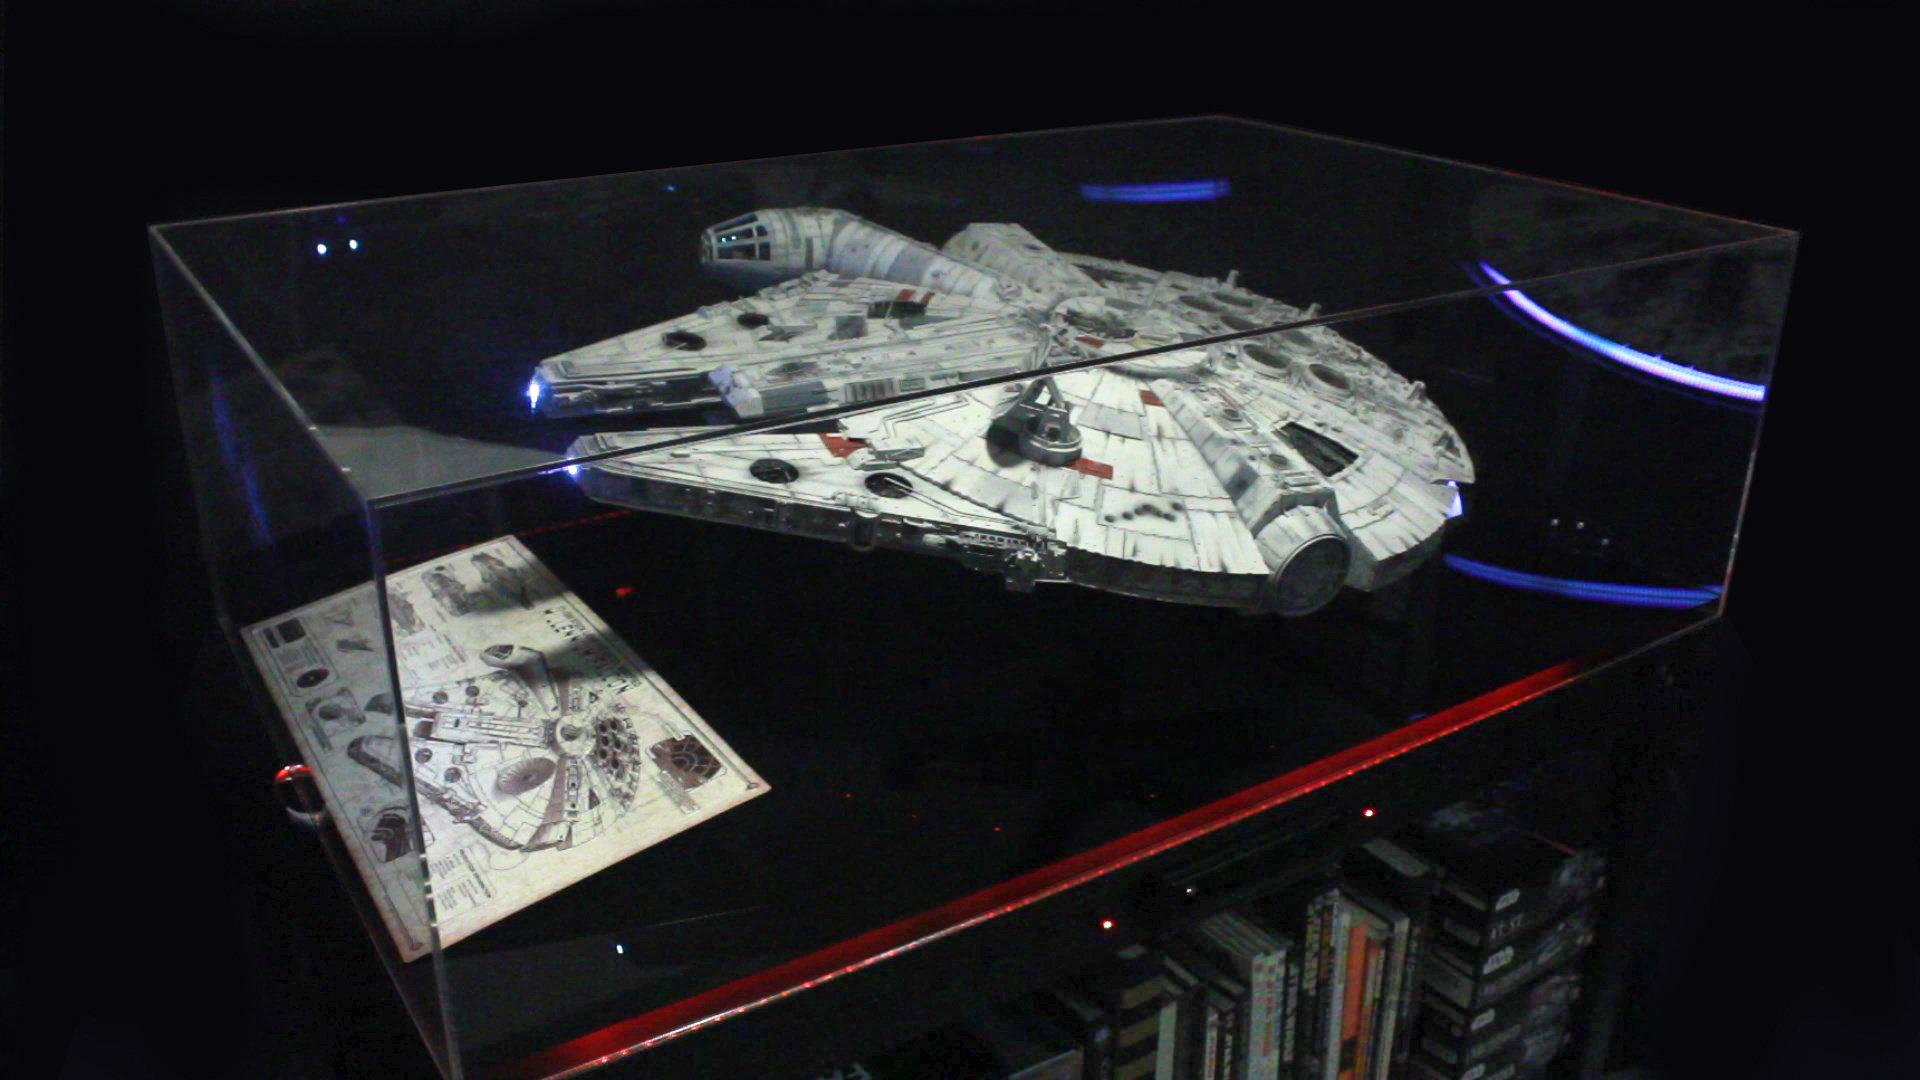
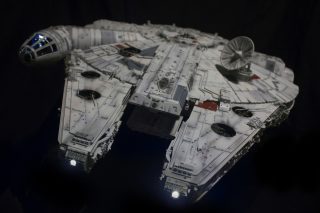
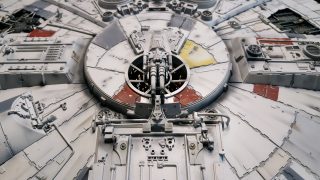
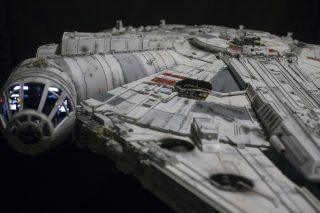
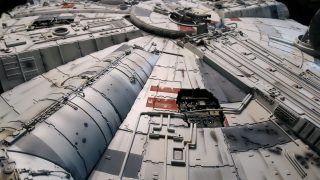
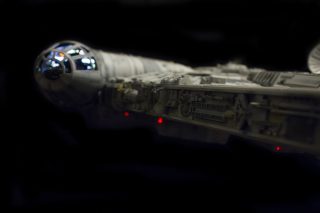
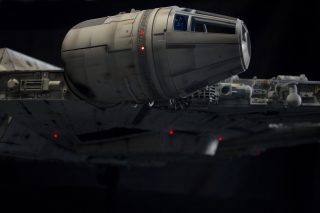
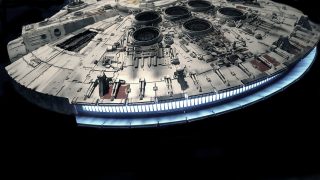
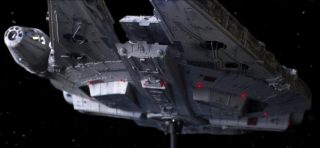
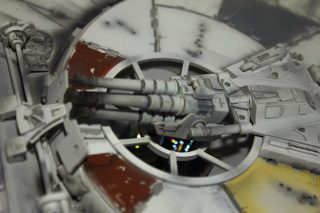
This is my pride and joy. The DeAgostini studio scale Millennium Falcon. Heavily modified by myself, not Han Solo. All lighting was done with LEDs, from 3mm to 0402 SMD LEDs, along with some fiber optics throughout. I had to make additional bread boards and wiring to connect it all to the main kit circuit board. The whole model running off of a 9v power supply.
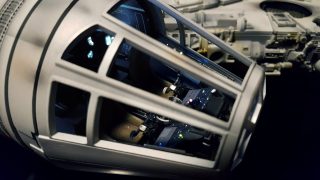
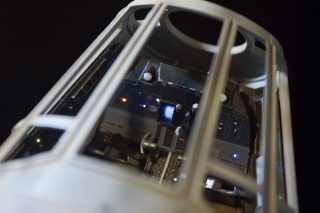
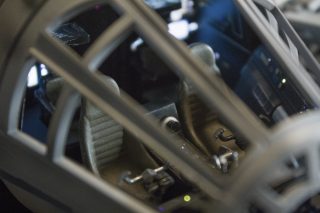
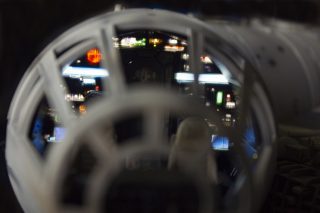
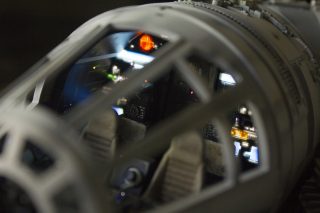
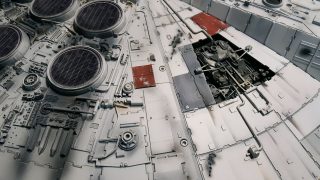
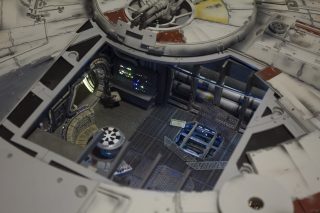
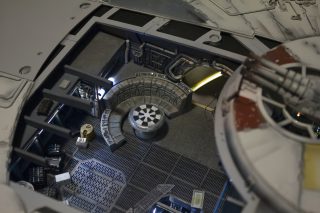
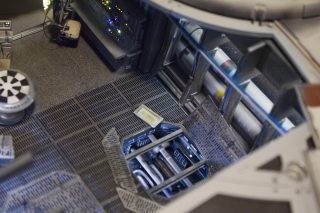
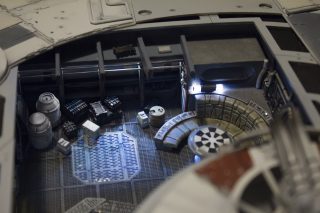
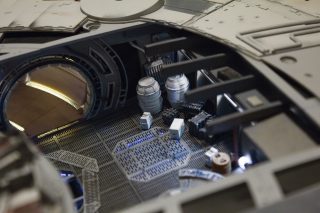
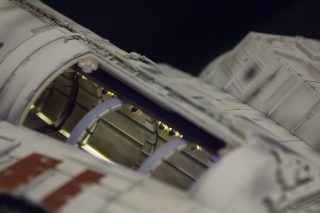
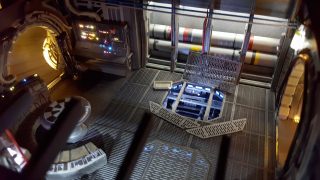
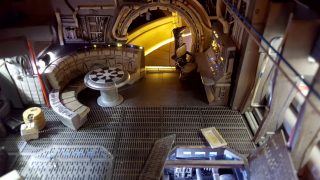
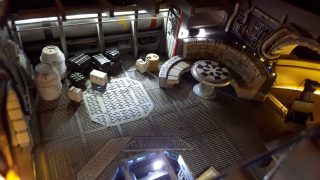
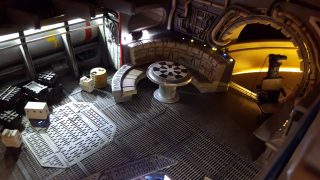
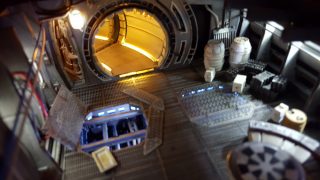
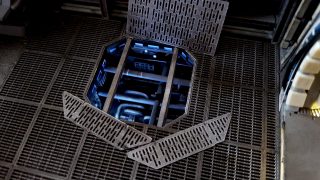
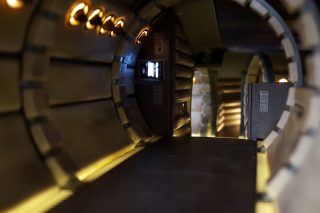
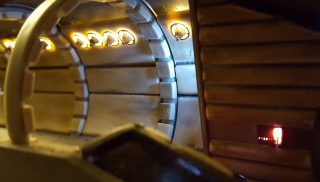
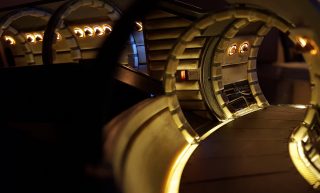
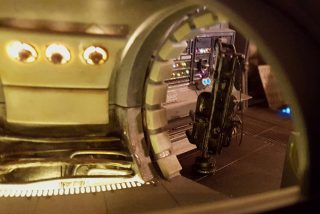
The cockpit monitor was scratch built from styrene. Cockpit lighting was done with .25mm fiber optic. The rear cockpit wall was one of the only kit lighting parts kept. In the hold, most of the additions were scratch built out of styrene. There are some greeblies which I added from pieces of an old MPC Falcon kit. The corridor floors are photo etch with lighting underneath. The corridor scones were scratch built with styrene tubing and lit with 0402 SMD LEDs. The crates, barrels and navigation chair were 3D printed from Shapeways. The Nav computer was lit using .25mm fiber optic. The maintenance pit was scratch built with styene sheets and tubing, with a few greeblies from the MPC Falcon. The circuitry bay was scratch built with styrene and greeblies from the MPC Falcon. All of the wall additions were done with styrene and some greeblies here and there.
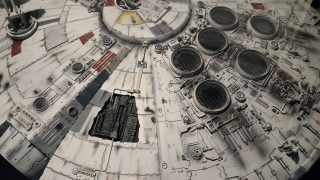
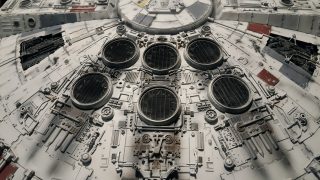
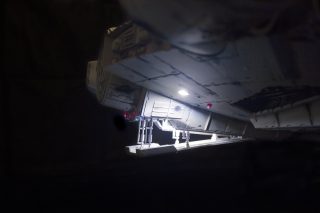
The red caution lighting around the underside of the hull and escape pods were done with 1.5mm fiber optics run to some internal red LEDs, and 3D printed light housings.. The engine lighting was slightly modded with additional LEDs to even out the lighting across the back with a photo etch engine grill. I rewired the landing lights so that they only come on when the landing ramp is lowered, and turn off when the ramp is closed. As my model is displayed in the flying position, I don’t really ever have the ramp open. The front headlights are the only other kit lights that were kept.
This was by far my most enjoyable model build I’ve done. Absolutely loved everything about it and is proudly displayed on a custom table I built with a a built in monitor which displays my making of videos and is illuminated around the edges with LED. Covered with a custom museum quality plexi case I had built to my specs. Hope you enjoy my build.
Chris


Christopher Olson
**

*****************************
*****************************
*****************************
Statements made, or views expressed may NOT be the views of Modeler’s Miniatures & Magic
Pricing and Availability are subject to change by the Kit Maker/Vendor or Artist at any time. Modeler Magic is not responsible for maintaining the prices in accordance to the changes made by the Kit Maker/Vendor or Artist.
Professional Customer Service and Quality Control are the responsibility of the Kit Maker/Vendor or Artist selling the item of which Modeler Magic is only showing for them.
Modeler’s Miniatures and Magic has no professional or monetary affiliation with any kit makers, vendors or artists shown on this site other than showing the works and offerings those Artists, Kit Makers and Vendors wish to show on Modeler Magic in their own names. Modeler Magic promotes the art form in this way. Modeler’s Miniatures and Magic claims no trade marks or copyrights on anything shown on it’s site other than it’s own created artwork presented. Modeler Magic reserves the right to remove any material shown at any time from anyone, and we will follow all legal aspects of the art form as they are presented to us by the proven legal owners of the above stated materials and/or their court appointed representatives.
****************************************