

FOR SALE!!
Jeff Summers
Presents
Disney’s
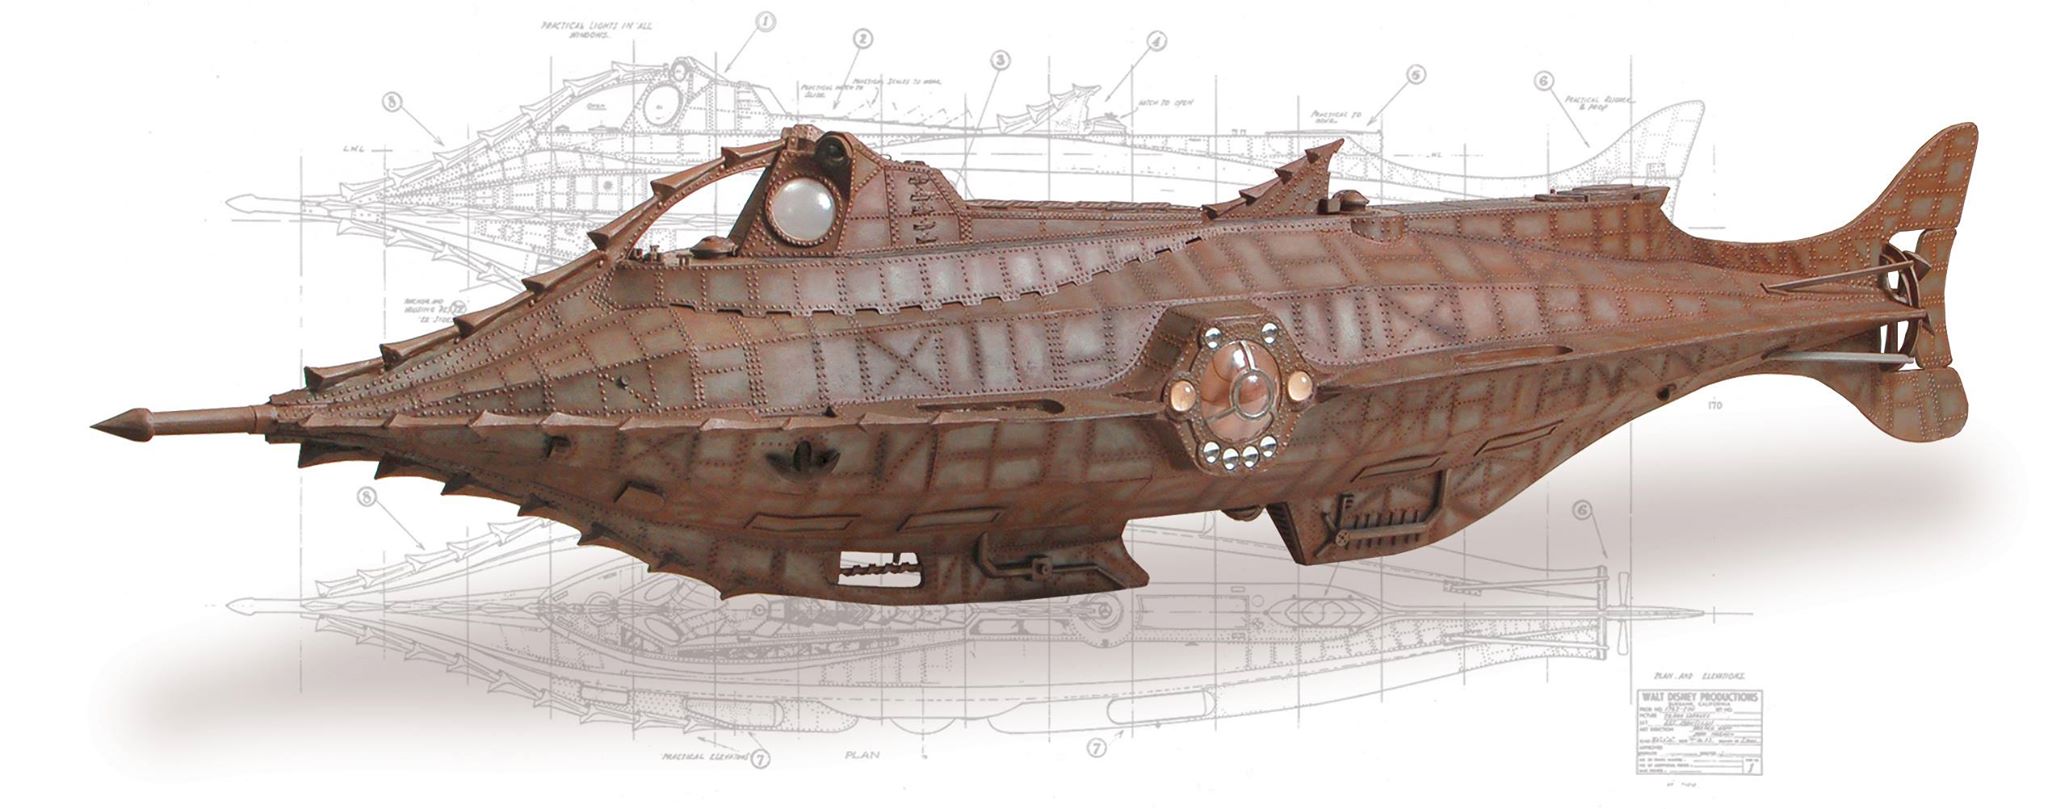
20,000 Leagues Under the Sea
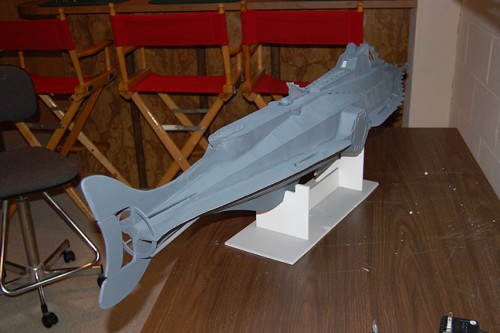
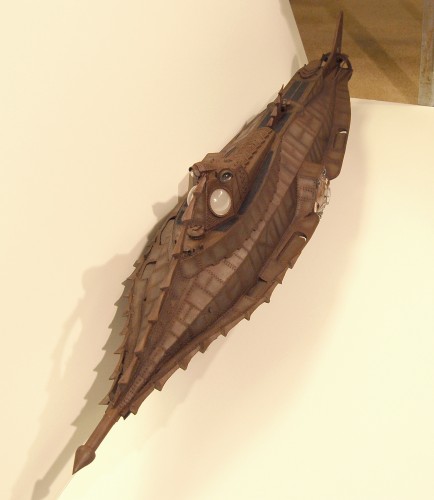
57 Inch!! NAUTILUS
$1,900 USD
Plus Shipping
I began by downloading the readily available on-line original blueprints and tile-printed them at my office. I ended up with 3 sets of pieced together blueprints, the subject of which measured 57” from tip to tail. I eagerly carried my rolled up blueprints home and set up a make-shift work area in my basement.
View 24 MORE detailed photos below this amazing text, telling of the build details…
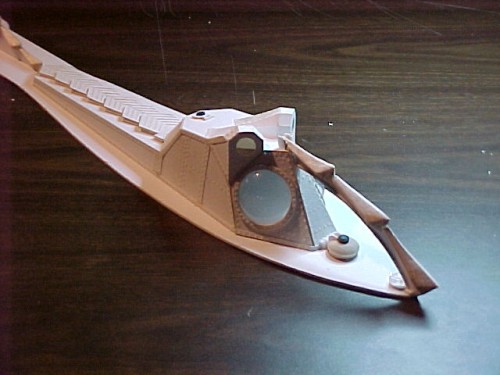
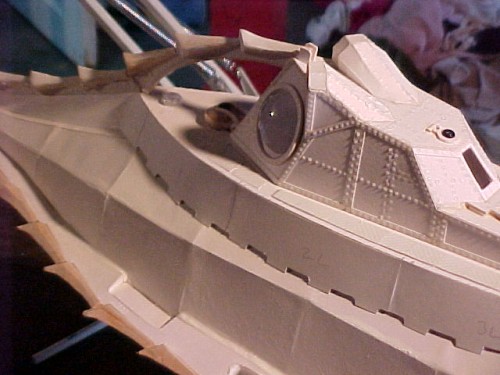
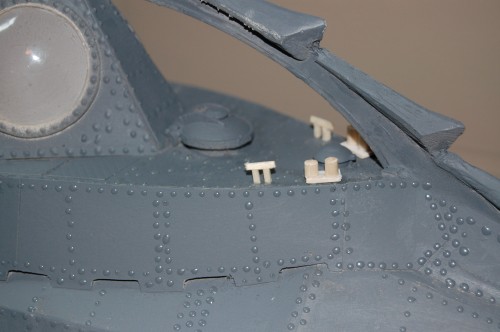
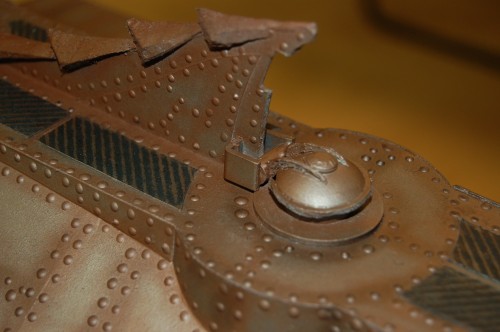
The Wheelhouse
I started with the wheelhouse as it seemed the easiest and most logical place to begin. I used velum and pencil to transfer individual parts of the layout from the blueprints to the illustration board from which I would cut the shapes. All in all the process worked well and I had a completed wheelhouse shell fairly quickly. The alligator eyes were much more difficult than I thought they would be. The descending polygon shapes which meet with the top of the wheelhouse were difficult to accomplish.
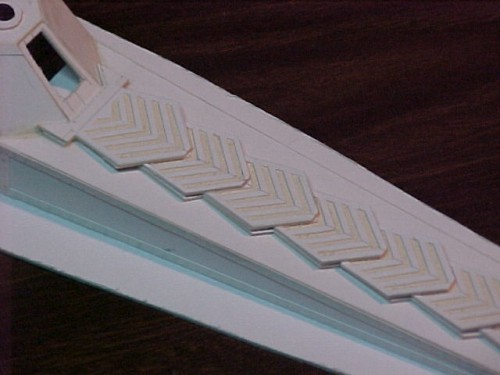
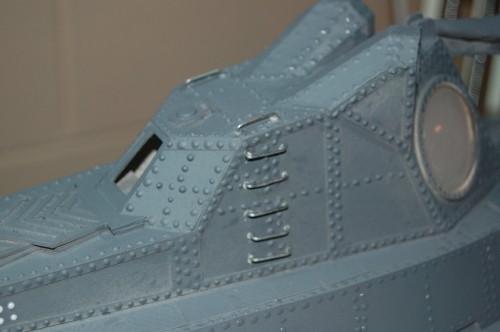
The breathers were created in two layers, one cut as a single piece of illustration board, and another layer cut one breather at a time, and overlayed on top of each other. The details in the breathers were cut into the first few layers of the board and lifted out.
Other details were cut and laid on and then came the moment of truth…. since I had almost a complete Wheelhouse, I decided to experiment with rivets . I elected to try good ol’ Elmers glue and began, one tiny drop at a time, to place the rivets. However, as the glue dried, it flattened slightly and I found myself having to put them on three or four times before they had a depth and shape I was happy with. I figured there had to be a better product out there for this. I found something called Pine Car glue at the local Hobby Lobby and decided to try it. This worked much better as the rivets held their shape with only one application.
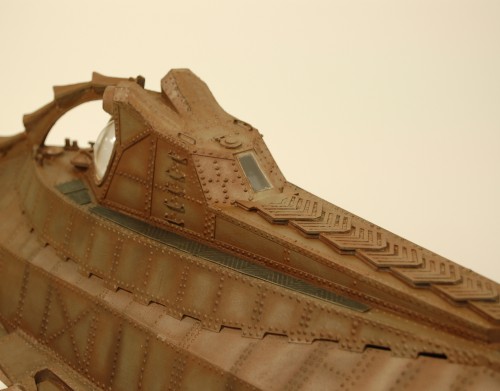
I used light bulb blister packs from which I cut the wheelhouse viewports. The viewport openings themselves were covered from behind with velum. I elected to carve the rakers from 1/2″ x 1/2″ x 18″ balsa wood lengths using an Exacto knife. And other details such as hatches where pre-packaged wood shapes which I also picked up at Hobby Lobby. With some enhancements, these inexpensive pieces made convincing hatches.
For the deck grating, I used cover weight laid stock (which has pre-embossed horizontal lines). I cut sections at the proper shape and with the lines at the proper angles and glued them to the top of the deck.
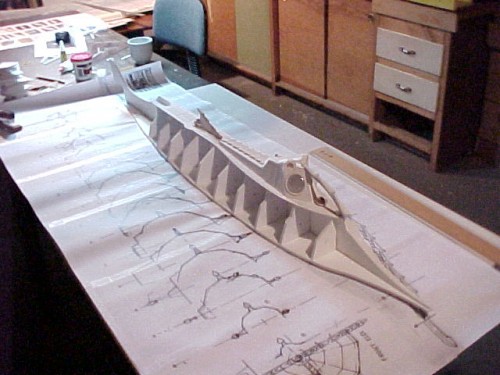
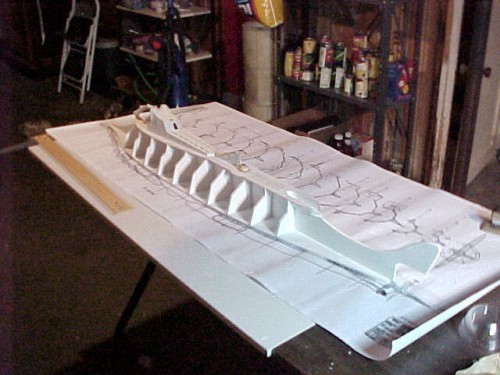
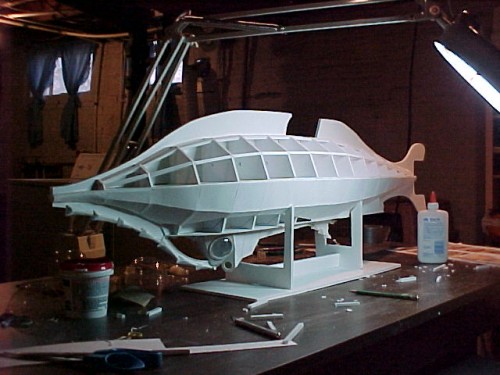
The Hull
Once the Wheelhouse and the deck on which it sat were complete, the next step would be to create the main hull. I used 3/16” foam core board and traced and transferred the profile of the main hull including the tail, and keel. Then I cut the shape of the hull as viewed from the top (excluding the side keels which enclose the dive planes). I then cut a 3/16” wide section out of the side profile, following the centerline of the model.
So in essence, I ended up with 3 – 2 dimensional pieces which represented the basic shape of the submarine, upper profile, lower profile, and the shape as viewed from top, which I will call the footprint, for lack of a better term.
I then went back into the original blueprints file I had downloaded and, bringing the jpeg file into Macromedia Freehand, I set my polygon tool to 10 sides and traced the cross section shapes (bulkheads) that run forward to rear in the blueprints, adding the shapes for the scupper area and rear deck support. I gave each a letter designation and divided them into 4 sections with a 3/16″ gap in between. I then spray glued these patterns onto the foam core, and cut them out with an exacto knife. I also cut each into its 4 individual sections.
I laid the footprint flat on my work table, and then applied white glue along the bottom edge of the upper profile hull shape and placed it on top in an inverted “T” onto the footprint, being careful to lift the front of the footprint to match the upward sweep curve from the position of the salon forward to the bow. By adding some of the bulkhead pieces right afterward, it assured everything would dry square.
I cut 3/16” wide strips of foam core and cut lengths to match the space between the bulkheads. Laying them in against the profile shape in the center and then at the corners of the bulkheads, I created a structure on which I could lay the hull panels.
Because of my own limited skill, I decided it would be safer for me to lay hull panels down in sections, rather that trying to cut a single piece which would travel the entire length of the boat. I justified this in my mind by convincing myself that it was probably closer to the way in which a “real” Nautilus might have been constructed. I knew I would end up with a rough, “stepped” look to the hull, but reasoned that, with some putty and the addition of the rivets (which would visually break up the spacing), it might not be too distracting. The hull panels were cut from coated poster board.
I then turned the model upside down on one of many temporary foam core stands I would use during construction, and repeated the process, gluing the lower hull profile to the underside of the footprint, and applying the bulkheads and hull panels.
I used the same process in applying the hull sections to the scupper apron and the sides of the skiff area toward the back.
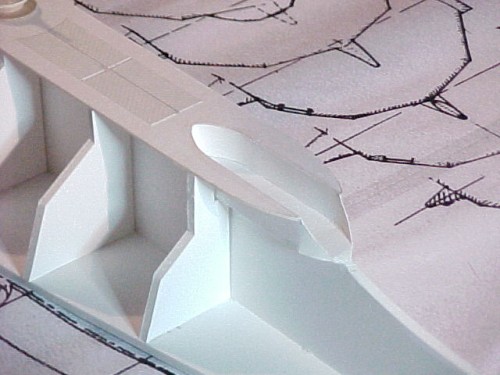
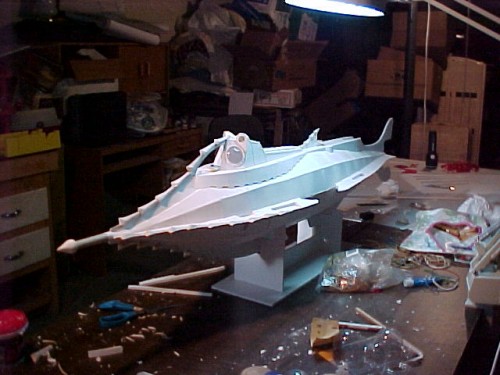
The Side Keels (dive plane housings)
Creating the side keels was a matter of transferring the shape onto illustration board and cutting them out — 2 for each of the 4 sections. Then I cut triangular pieces of illustration board to use a “ribs” on which the two halves of each section would ride. I then simply sealed all the edges including the dive plane openings with cut poster board. Then I laid the model on its side and glued the keels in place.
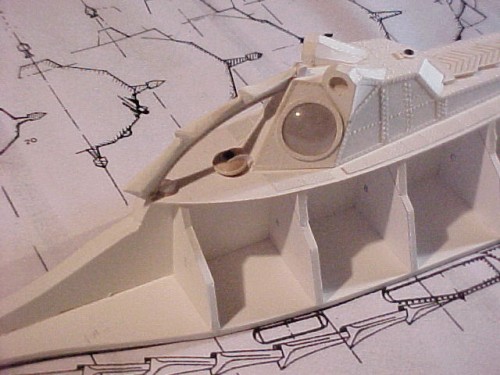
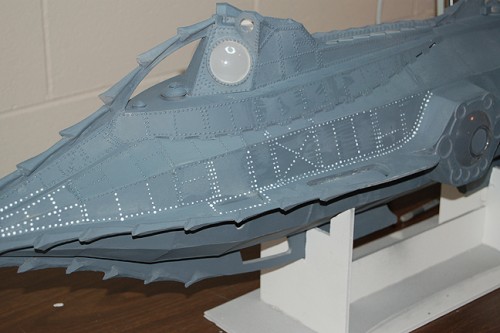
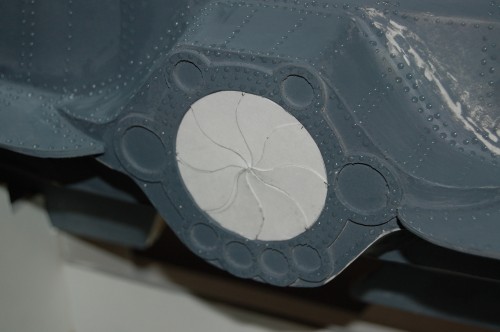
Salon Windows
I cut two support shapes from foam core for each side, which acted as a “stand out” on which I attached the face of the salon window housing. Each side of the housing face was contoured and curved around to slip neatly into the notches left in the side keels. Then I drew the salon window/light dome frame in Freehand, spray mounted the drawings onto illustration board, cut them out and attached them to the housing faces. The housing top and bottom were finished by laying a strip of poster board on and drawing the shape I would need onto them (this took a couple of tries). I then cut, glued and formed the pieces into place and when dry, trimmed off the excess material.
For the irises, I cut a pattern which I transferred from the blueprints. I rotated and drew sections onto coated poster board. I then cut the individual sections and glued them in layers in a radial pattern inside the window frame.
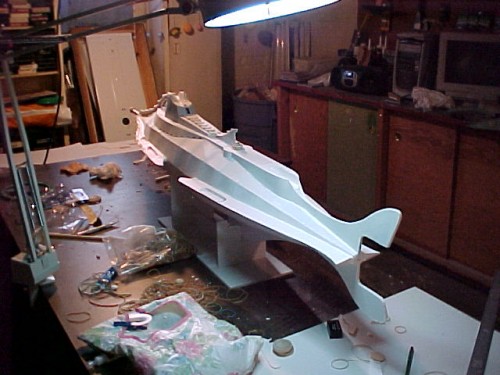
Smoothing
For smoothing the model, I elected to use light weight spackling compound, used in drywall applications. It is perfect when building with paper materials and especially when building on a large scale. It is easy to work with, it sands well and, most importantly, it’s inexpensive.
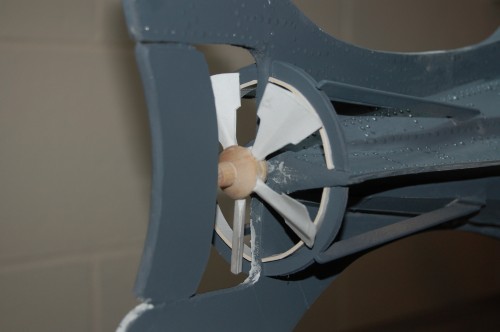
Prop Guard and Braces
I cut the prop guard from illustration board by simply cutting the circular shape, then I lined the inside circle with a facing of 1/4″ wide illustration board strips. The braces were pre-packaged wood sticks from Hobby Lobby which were angle- cut at one end to sit on an illustration board, rectangular shaped base, and notched at the other end to rest neatly on the guard ring.
Prop
The prop was made from three different pre-package wood shapes, glued together to form the hub, and 1/8″ wood stick (Hobby Lobby) cut to length and glued around like spokes. I then cut the prop blades from coated poster board (2 shapes for each blade) and sandwiched them around the sticks at the proper angle. Then I filled any gaps and capped the ends with the light-weight spackle.
Ramming Spur
The ramming spur was actually a left over engine nacelle from the Polar Lights U.S.S. Enterprise model. I cut the length and made the end by combining a pre-packaged wood shape and a cone I made from paper. With some spackle it came together rather well.
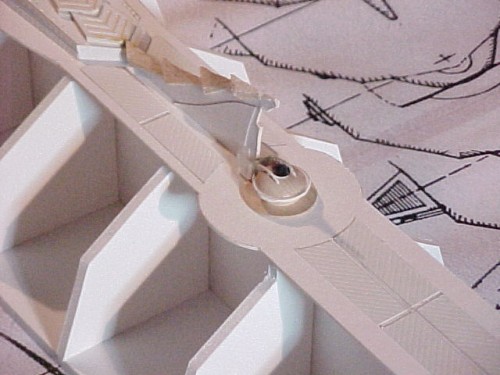
Skiff
The sliding top was made by cutting three individual shapes from illustration board and covering them with the laid paper in the proper grid pattern. Then I built them up on top of one another. The hull of the skiff was made similarly to the hull of the sub, a profile shape and bulkhead “ribs”. Then I glued the whole thing into the skiff slot and filled in the exposed hull with the light-weight spackle.
Other Details
- Anchor: Cut Illustration Board
- Various “Scoops”: Package blisters and leftover Enterprise parts.
- Cleats: Wood sticks
- Keel Details: Miter-cut #2 pencils, wood sticks and pre-packaged wood shapes.
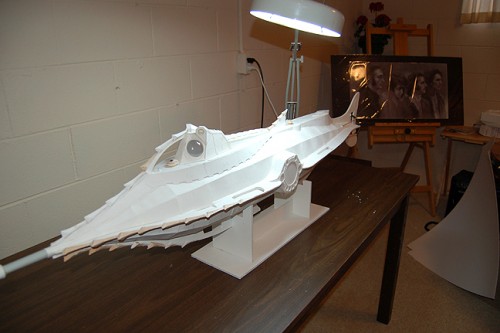
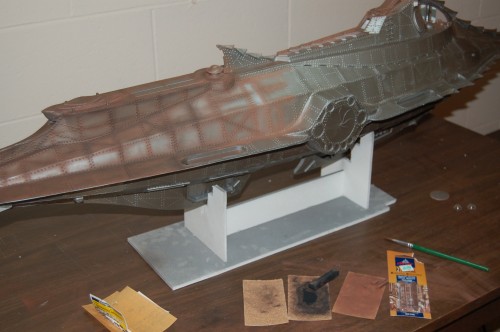
Finishing
I applied the first coat of primer to the entire model in preparation for the rivets. Then came the lengthy task of applying rivets using the Pine Car glue. I did it in sections and worked and turned the model until all the rivets were applied. This took a few days.
I then applied a second coat of primer. For the final color, I wanted something different from other Nautilus models I had seen. I knew I didn’t want gold, or copper, nor did I want just a brown color. I elected to use metallic bronze paint (though in the construction pictures, the paint appears silver). I applied the paint onto the entire model. Next, I used a combination of powdered charcoal and conte crayon to weather the vessel. I rubbed the sticks on coarse sandpaper to get the powder, and applied it heavily to the rivet lines with a small brush, and then I very lightly brushed the powder over the rest of the model.
I rubbed the black charcoal stick directly against the laid stock deck grating which brought out the detail. Next came 2 coats of dull coat clear enamel, which not only sealed the weathering powder, but also knocked the metallic paint back and gave it a very blended, realistic appearance. The salon window irises were painted with a flat tan model paint, as were the openings for the large side light lenses.
Final Parts
I used 3/4” dia. clear domes which I ordered online for the larger light lenses on either side of the Salon window, and for the smaller light lenses, I used some 1/2” dia. clear domes with a mirrored back which I got at Hobby Lobby. The Alligator Eyes are Enterprise engine nacelle caps. The salon windows themselves were cut from clear domed drink lids… the kind you might get at Dairy Queen that have a hole in the top for a straw. Then I cut another light bulb package blister to seal the hole. I glued all of these items into place. The last thing I did was to draw and cut the salon window braces out of illustration board, paint them with the metallic bronze paint, and glue them into place.


Jeff Summers
To contact this artist direct, please click the CONTACT ARTIST link below.

*****************************
*****************************
Statements made, or views expressed may NOT be the views of Modeler’s Miniatures & Magic
Pricing and Availability are subject to change by the Kit Maker/Vendor or Artist at any time. Modeler Magic is not responsible for maintaining the prices in accordance to the changes made by the Kit Maker/Vendor or Artist.
Professional Customer Service and Quality Control are the responsibility of the Kit Maker/Vendor or Artist selling the item of which Modeler Magic is only showing for them.
Modeler’s Miniatures and Magic has no professional or monetary affiliation with any kit makers, vendors or artists shown on this site other than showing the works and offerings those Artists, Kit Makers and Vendors wish to show on Modeler Magic in their own names. Modeler Magic promotes the art form in this way. Modeler’s Miniatures and Magic claims no trade marks or copyrights on anything shown on it’s site other than it’s own created artwork presented. Modeler Magic reserves the right to remove any material shown at any time from anyone, and we will follow all legal aspects of the art form as they are presented to us by the proven legal owners of the above stated materials and/or their court appointed representatives.
****************************************