
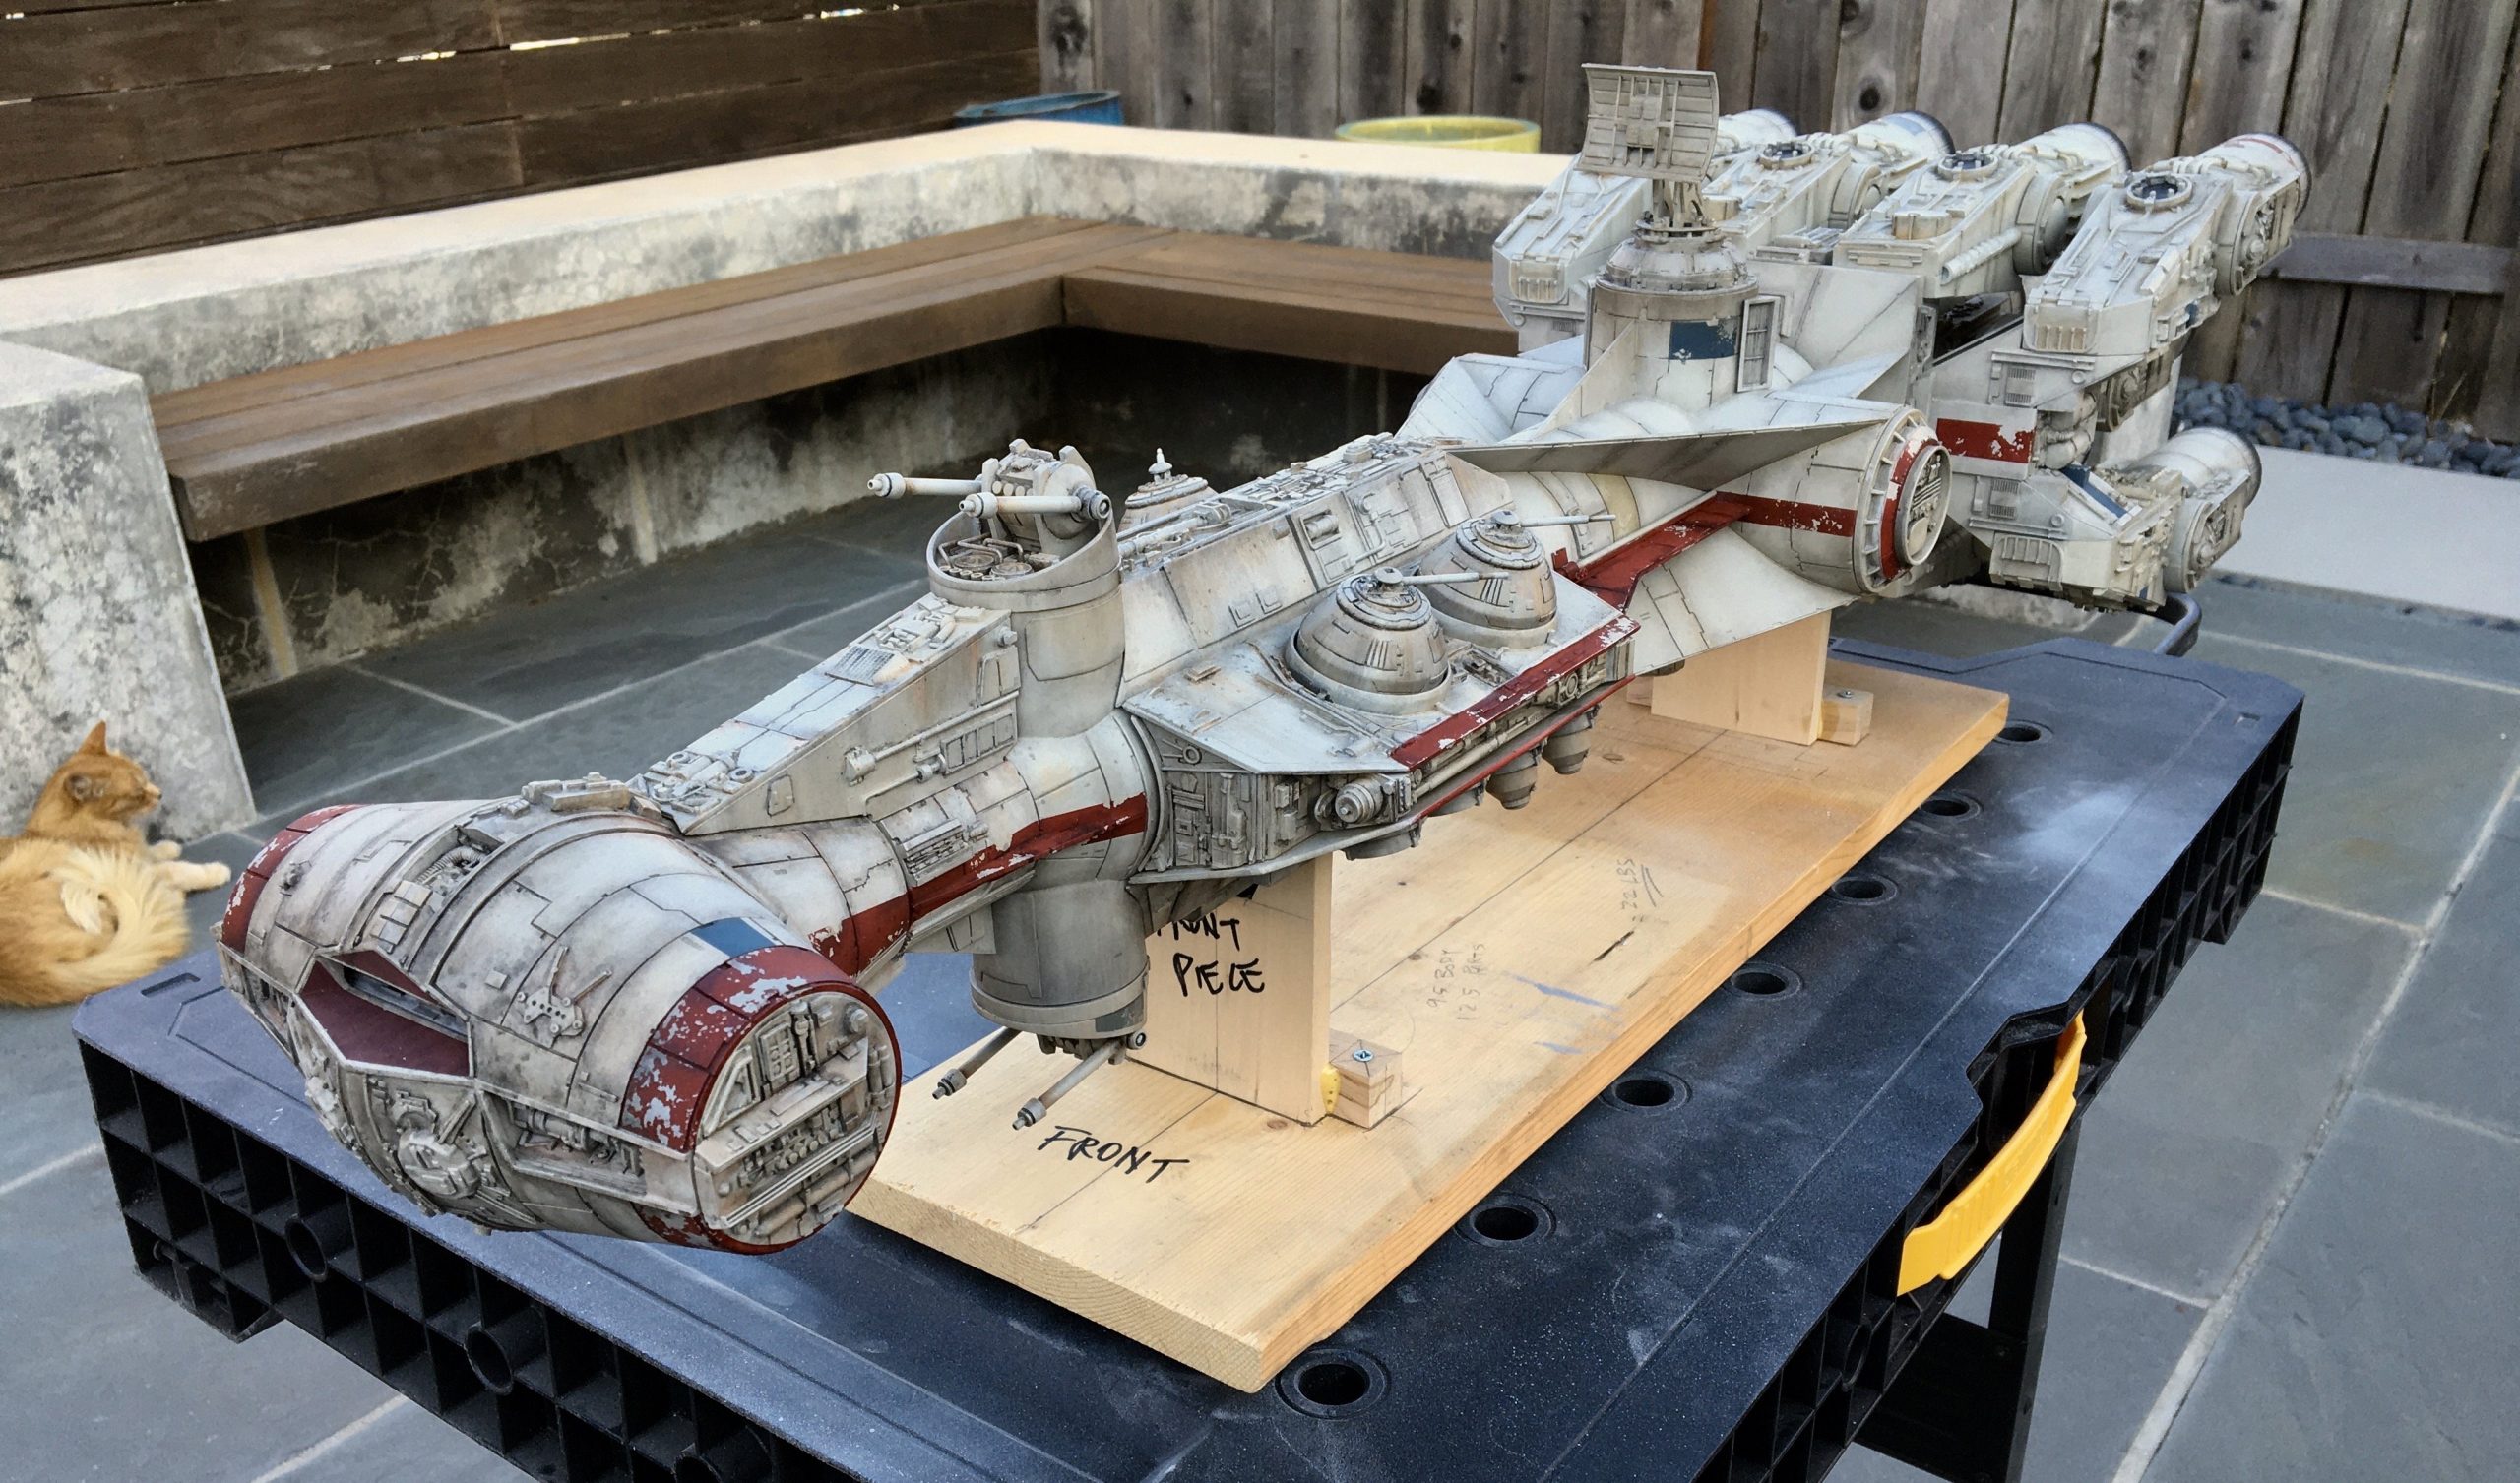
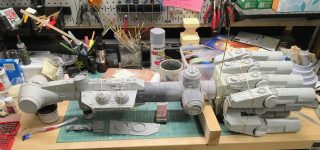
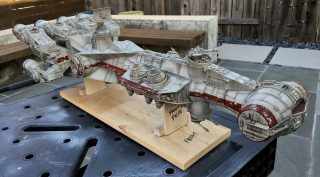
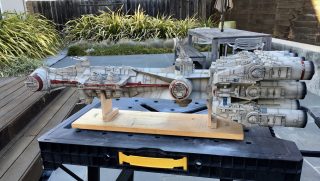
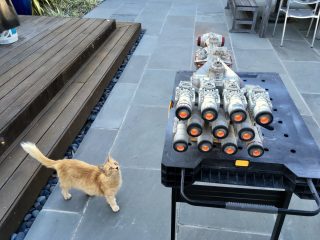
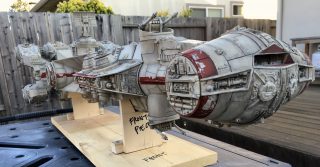
After expressing my disappointment with a different Kit Maker’s Blockade Runner kit I had just purchased, my friend suggested I look into the ~39″ Korbanth Kit instead. They made a BR but at a scale that was very large. Looking at their website, the castings look decent enough so I took the plunge. The kit is too large for me, but since the castings were decent, I was OK with the scale.
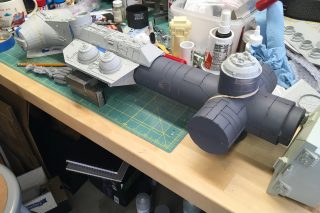
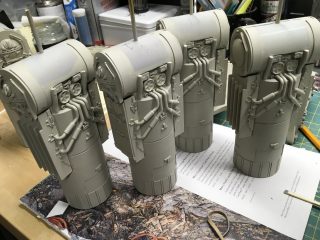
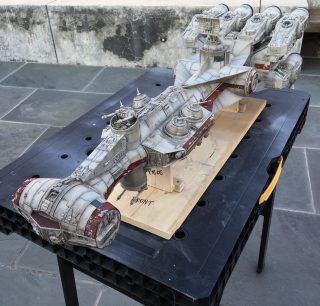
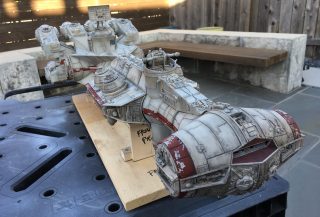
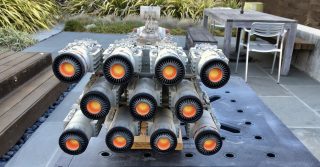
The kit has clean castings and I was happy with them. One thing that the model needed help on was how it was engineered in its construction, specifically in the engine block which has to connect the tube fuselage in the front of the block and 11 engines in the back. This meant the engine block was going to be heavily stressed having holding on to the front and rear details. I didn’t have faith that superglue will be enough to carry all that weight and stress. Unfortunately, the tube fuselage insert wasn’t deep enough of a plug to go into the engine block and I had to improvise by pouring resin into the rear of the fuselage tube to make it solid, then insert it to the engine block cavity, and finally drilling holes from above to pin the block to the fuselage tube. The pin acts as additional brace so the units have a “lock” on each other and difficult to come off.
There were other minor issues on how the engines lined up but they were easily solved. In the end, I also pinned the engines into the rear of the engine block since there weren’t any locators for them to sit in. The rear is just a flat surface.
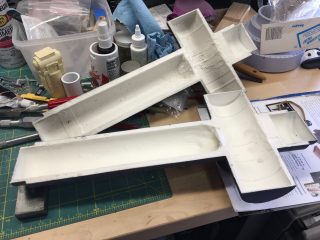
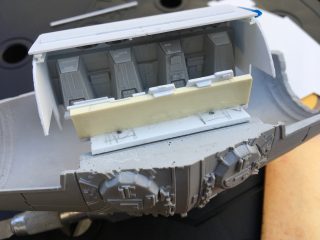
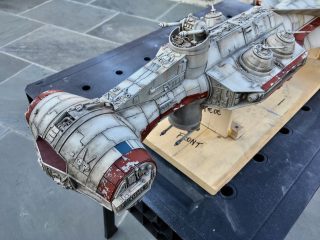
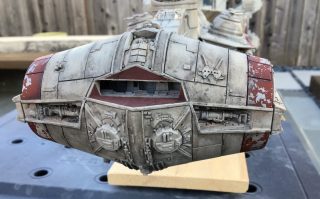
The model itself is a joy to build. The castings are clean and things fit. One area I wanted to change was the hammerhead. Since the kit didn’t come with a cockpit, I made my own out of some misc model kit parts, styrene chips and different color vinyl tape to create the graphics. The hammerhead fuselage was also split on the horizon so I glued it, puttied it, and rebuilt it. At least to fake it.
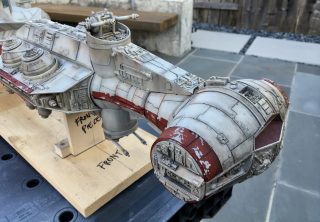
The paint was done with Home Depot primer and painted with Testors FS 3622 Camo Gray and I’ve seen BRs on YouTube where people would put a massive black wash on it, then proceed to wipe it off leaving the crevices to be filled with black. I felt it was too heavy for the scale so I decided to use oil washes, but only at where the recess panel lines were. In the case with the hammerhead and details, I used a bit more washing but on the areas where there wouldn’t be less details like the wings, I made the wash minimal.
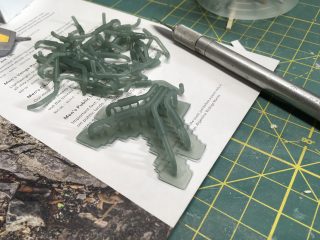
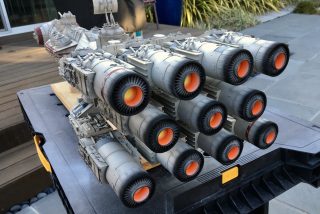
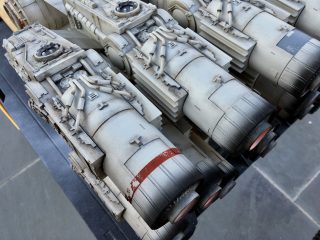
The engines did not come with the bent pipes. Each engine has 4 bent pipes and I felt the best way to get consistent parts were to 3D print them. Since I don’t have a printer, I asked my friend to do it and he took the engine pieces, scanned them and built a 3d model of pipes and printed them on his 3D printer. The results were fantastic and I bought him lunch for helping me on this. There was simply no way I was able to bend 44 pieces of pipe consistently. At least for me.
Other weathering methods were done with Tamiya panel line black and brown, some Prismacolor pencil and painted oil streaks. I kept the weathering to a minimal remembering what was said, “Less is More.”
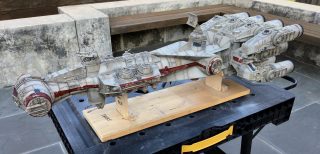
Since the model is not lit, I had to fake the engine burn and this was done by creating a gradient using Adobe Illustrator, printing it out on quality paper using a quality color printer, then simply taping it to the back of the exhaust. To enhance the illusion of a burn, I bought a neon red can of spray paint and sprayed some of the paint to the exhaust so when the label and exhaust was together, it created a glow as if the ship was on afterburner. A label was a cheap way to get the glow but it worked much better than I thought it would.
MarioMaker


**


Randy Johnson
USA
**

**

**

*****************************
Statements made, or views expressed may NOT be the views of Modelers Miniatures & Magic
Pricing and Availability are subject to change by the Kit Maker/Vendor or Artist at any time. Modeler Magic is not responsible for maintaining the prices in accordance to the changes made by the Kit Maker/Vendor or Artist.
Professional Customer Service and Quality Control are the responsibility of the Kit Maker/Vendor or Artist selling the item of which Modeler Magic is only showing for them.
Modelers Miniatures & Magic has no professional or monetary affiliation with any kit makers, vendors or artists shown on this site other than showing the works and offerings those Artists, Kit Makers and Vendors wish to show on Modeler Magic in their own names. Modeler Magic promotes the art form in this way. Modeler’s Miniatures and Magic claims no trade marks or copyrights on anything shown on it’s site other than it’s own created artwork presented. Modeler Magic reserves the right to remove any material shown at any time from anyone, and we will follow all legal aspects of the art form as they are presented to us by the proven legal owners of the above stated materials and/or their court appointed representatives.