
I have the great pleasure of introducing another fine talent to this gallery family… artist Jeremy Kennedy. The custom work Jeremy has done here is fantastic. I am looking forward to viewing and showing more from this artist.

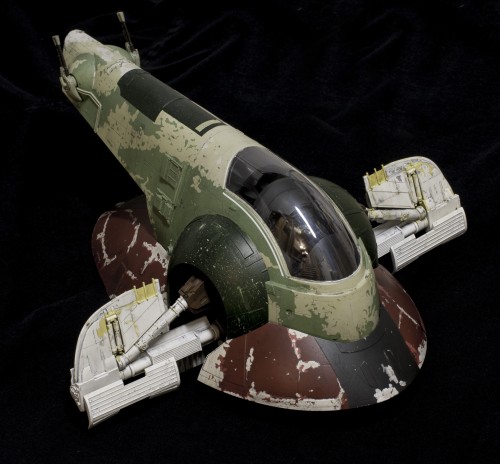
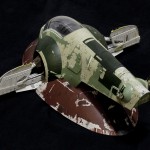
I Used Micro Mask liquid mask to make all the varied paint chipping over the hull. Base coat on the skirt was a Tamiya rattle can (can’t remember the color now sadly. Then two different shades of red based off of a Tamiya hull red. On the main hull, base color is a Tamiya rattle can light grey, followed by airbrushed acrylics of JA Grey and then a custom JA Grey/Green mix.
Most of the interior (I’ll have to take some pics of that it seems, if anyone wants to see them) is Nato Black, and varied shades of that.
Weathering was a bunch of Flory Models washes, along with some of the Tamiya weathering make up kit thingies. Tried doing some washes with oil paints and I just can’t get them to work for the life of me.
Now for my customizations.
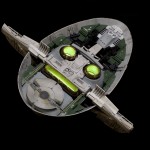
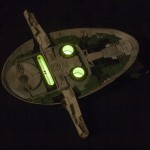
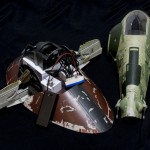
Wanted to light the thing, and, whenever possible, I like to keep my lighting self contained. Fortunately, the top shell fits onto the skirt very tightly just on its own. So, I’ve decided not to glue it together . . . which allows me access to the “nose” of the model, where a battery pack can sit. I’m using 8 LEDs to light it. 2 in each of the round thrusters, three in the long narrow one, and one more LED for my subtle cockpit lighting. The cockpit lighting doesn’t show up very well sadly. I didn’t want to go the standard route of fiber optic buttons and such, the scale didn’t seem right to me, and never personally liked seeing the Slave 1 cockpit lit up like a Christmas tree in some other models. So I noticed that above Boba Fett’s head, there were two “grate” like areas. So I carved them out, rebuilt them with evergreen, and left them open to shine some light down. It puts a VERY subtle glow thru the cockpit. On one hand, I was a little disappointed you couldn’t see it more, but . . on the other hand, it does seem to be in scale.
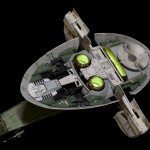
On the “engine” side of the ship, I had a rather bad catastrophe, and I completely ruined the two round engines. Without wanting to buy a whole new kit to replace, and knowing making my own was beyond my scratch building expertise, I enlisted the help of an engineer friend to make the pieces over in AutoCAD and had Shapeways 3D print them. They arrived about a week later, and after a light wet sanding, they were good to go. They looked fantastic, and, added bonus was that the original assembly was 3 pieces, and had seam lines I was fretting about how to get rid of. Now this piece was all one.
And lastly, on the long engine, as some of you know, the included piece is not able to be lit. It’s one big grey piece. I acquired from Blappy a clear resin copy of this piece. I was still worrying about how to mask off the engine grille inside, when I decided to just cut the engine grille out of the clear piece from Blappy, and then cut out the entire back wall on the kit supplied piece. Put in a piece of frosted clear plastic on the kit piece, glue in the clear grilles, and that was that.
I didn’t take too many WIP pics of this build. But it was fun, and I definitely learned a lot.
Jeremy


USA
****************************************